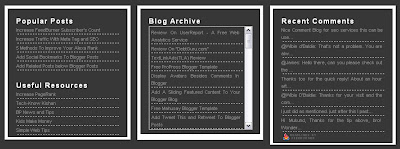
It is pretty common that you might have seen all the professional blogger templates would possess a three column footer where in, they add details about their site or an about me widget and lots more. I recommend you to add this feature in your blog to make it more professional. You may scroll down the page to have a look at the bottom of the page to have a look at this widget which contains Popular Posts, Useful Resources, Blog Archive and Recent Comments. Hope, you got an idea about what a three column footer is.
 To add this stylish three column footer to your blog, just follow these simple steps. As we always ensure safety, the first step would be to back up your template. To do this, simply navigate to "Design->Edit HTML and make a backup of your template clicking on the "Download full template" link at the top of the page. Once the back up is over, follow these simple steps.
1. Search for the following text in your blogger template. To fasten your search, use "CTRL+F".
]]></b:skin>3. Search your template for the following text.
</body><div id='footer-wrapper'>
<div id='lower-wrapper'>
<div id='lowerbar-wrapper'>
<b:section class='lowerbar' id='lowerbar1' preferred='yes'>
</b:section>
</div>
<div id='lowerbar-wrapper'>
<b:section class='lowerbar' id='lowerbar2' preferred='yes'>
</b:section>
</div>
<div id='lowerbar-wrapper'>
<b:section class='lowerbar' id='lowerbar3' preferred='yes'>
</b:section>
</div>
<div style='clear: both;'/>
</div> </div>5. Now, save your template and your ready with the footer section. Add any widget you want. Feel free to comment or contact me via Email for any assistance that you need to install this feature. I would be happy to help you!! See you soon in my next post!!!
I have read some fantastic books on English language that really helped me
improve my writing. You can buy my recommended books on
Amazon. Here is the
lists below:
Books on Grammar:


No comments:
Post a Comment
Note: Only a member of this blog may post a comment.